Welcome to Our Garage
Daytona Coupe, 289 and 427 Cobras
-27-
Daytona Coupe Cobra -
Steering, Dash & Windshield Areas
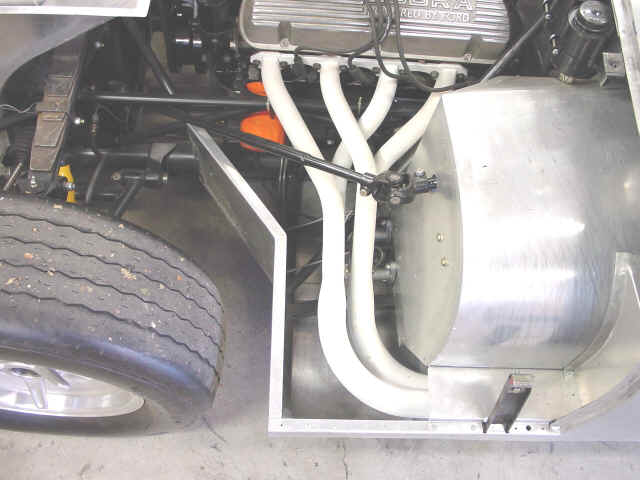
This section of the site shows some miscellaneous assembly shots, starting with the steering column and wheel. Although the roadsters and coupes used the same basic steering rack, the rack on the coupes utilized a shorter input shaft to provide clearance around the chassis stiffening structure. The shorter input shaft necessitated a different (longer) intermediate shaft. The steering rack and its short shaft are hidden beneath the spring in the following photos, but visible are the installed intermediate shaft, upper U-joint, and part of the upper steering shaft and steering wheel. In the original coupes, at least three different designs were used for mounting the upper steering column. In some cars the upper column is located above and completely outside of the footbox, while on others, the size of the footbox has been increased significantly and the column is located completely within the box. I have based my car on the enclosed column layout. Also, the steering wheels varied from car to car (and perhaps from race to race). Variations included the standard wood rimmed wheel used on the roadsters and a padded and taped wheel seen in some of the vintage photos of the coupes. I will be using the roadster version initially.
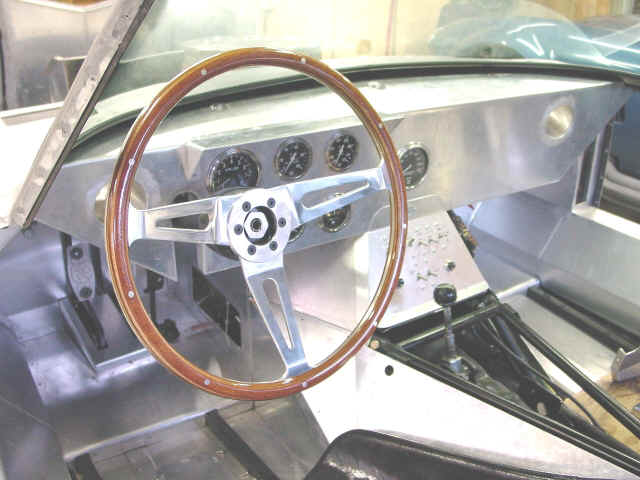
Previous pages on this site showed photos of the dash in progress. The following photos show the 99% completed dash. The sun shield over the gauges is in place as well as the gauges and switches.
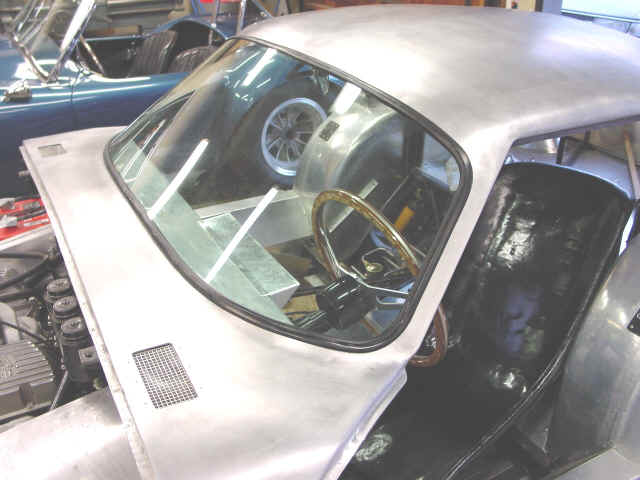
Installation of the windshield was the next task. As noted earlier in the story, my car was virtually built around the glass and unfortunately the coupe's glass was not shared with any other vehicle. The windshield is retained in the hole by traditional (at least traditional for the 1960s) weather stripping and not by an adhesive common to modern vehicles. The following photos show the windshield temporarily installed with several short pieces of weather stripping and wooden blocks to check the perimeter clearance prior to the final installation. The plywood support inside the car made it easier to position and provided an extra measure of insurance if the glass should try to fall out of the hole during the adjustment process.
Installation of the glass wasn't particularly complicated, just very time consuming and hard on the fingers. Fortunately I had two good friends (thanks Rick and Tony) that didn't mind spending several hours on a 95 degree plus day helping to mate the glass to the car. The following photo shows the glass in the car.
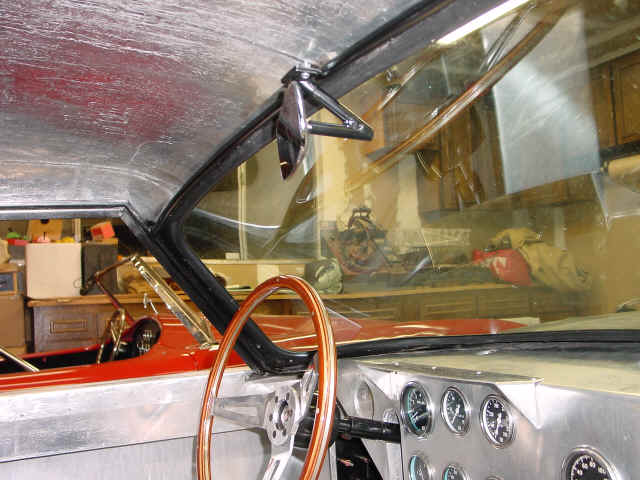
One of the more obscure pieces for the coupe is the interior rear view mirror. I spent a significant amount of time looking at vintage and contemporary photos of the mirrors used on the original cars, however I have not been able to confirm the exact identity of the donor vehicle from which the mirror was taken. Since the mirror is relatively simple to replace I've decided to make up a bracket and use a mirror that resembles the original for now. If in the future I find more detail on the original part, it will be a simple matter of replacement. The following photo is the mirror mockup in progress.


